Creating a Payment Link
Payment links allow you to request online payment from the buyer within a specific deal jacket. This article walks you through locating a deal jacket, creating and sharing a payment link, and managing payments, including issuing refunds or canceling payment requests.
Log In to Your Account
First, ensure you are logged into your My Dealer Jacket account. For detailed instructions, refer to the Logging In to My Dealer Jacket article.
Access the Deal Jacket Folder
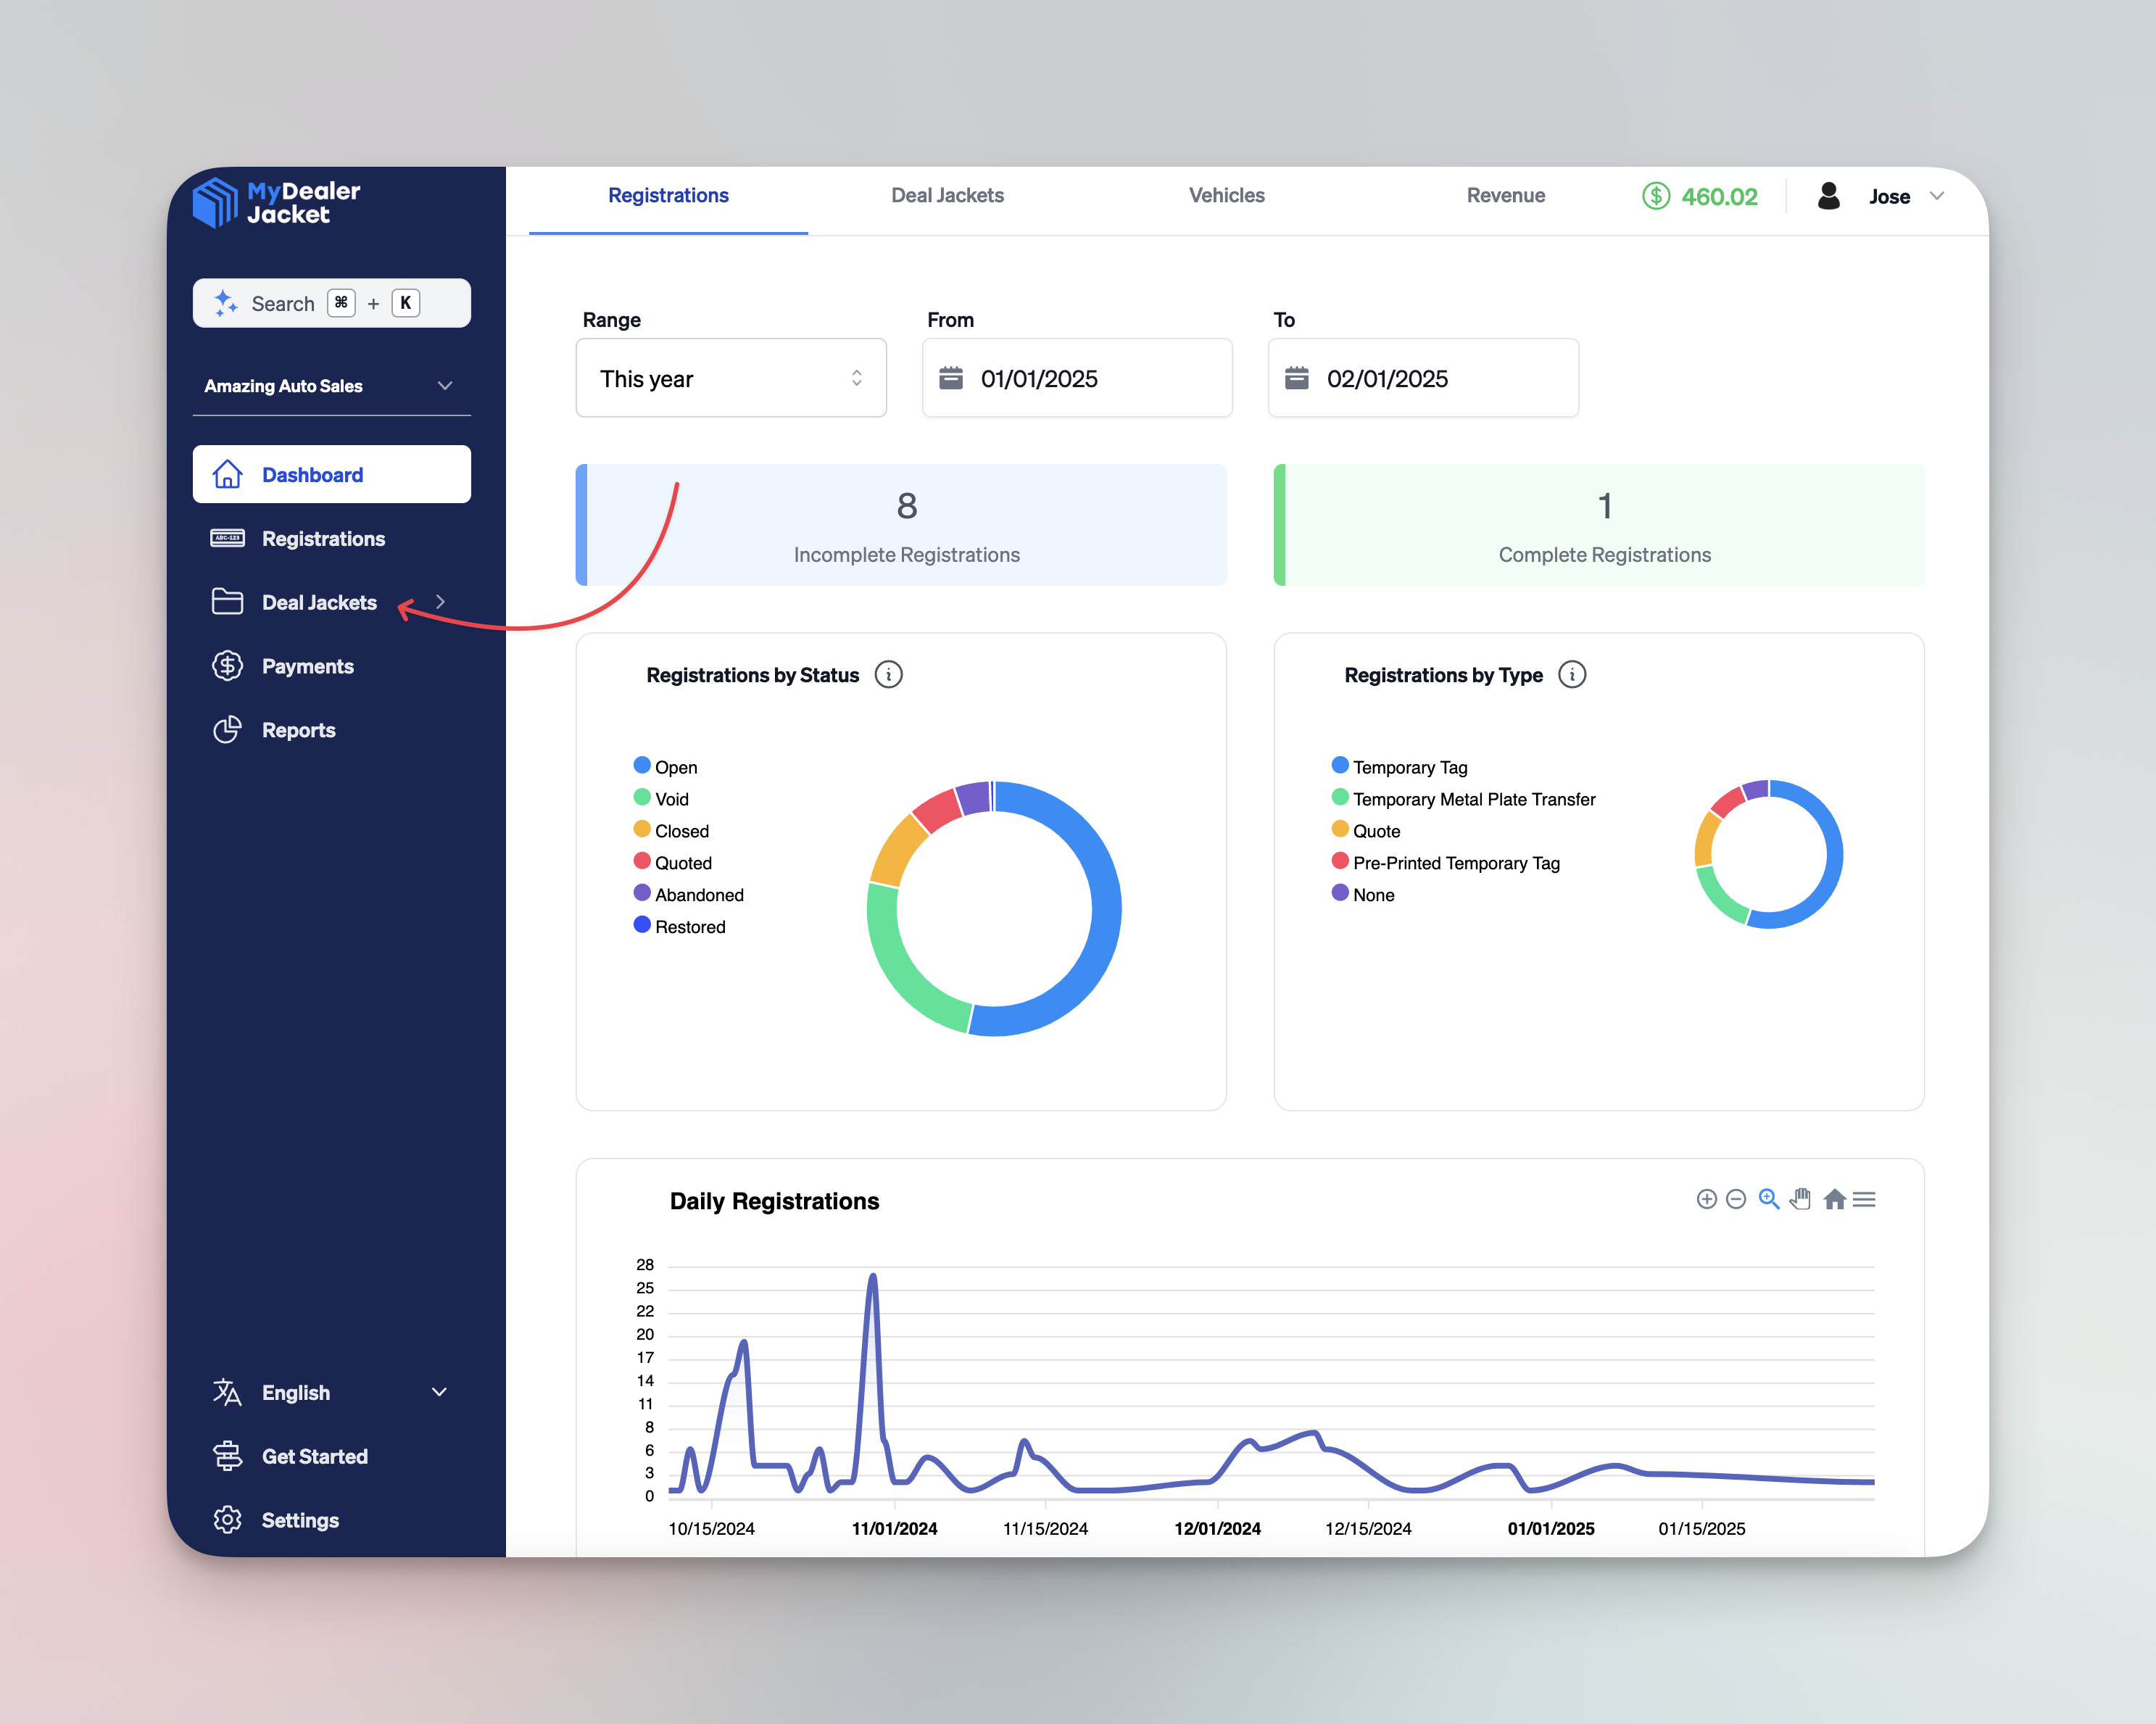
From the main Dashboard, locate the Deal Jacket folder on the sidebar menu.
Access the Relevant Deal Jacket
- From the main Dashboard, click Deal Jackets in the sidebar.
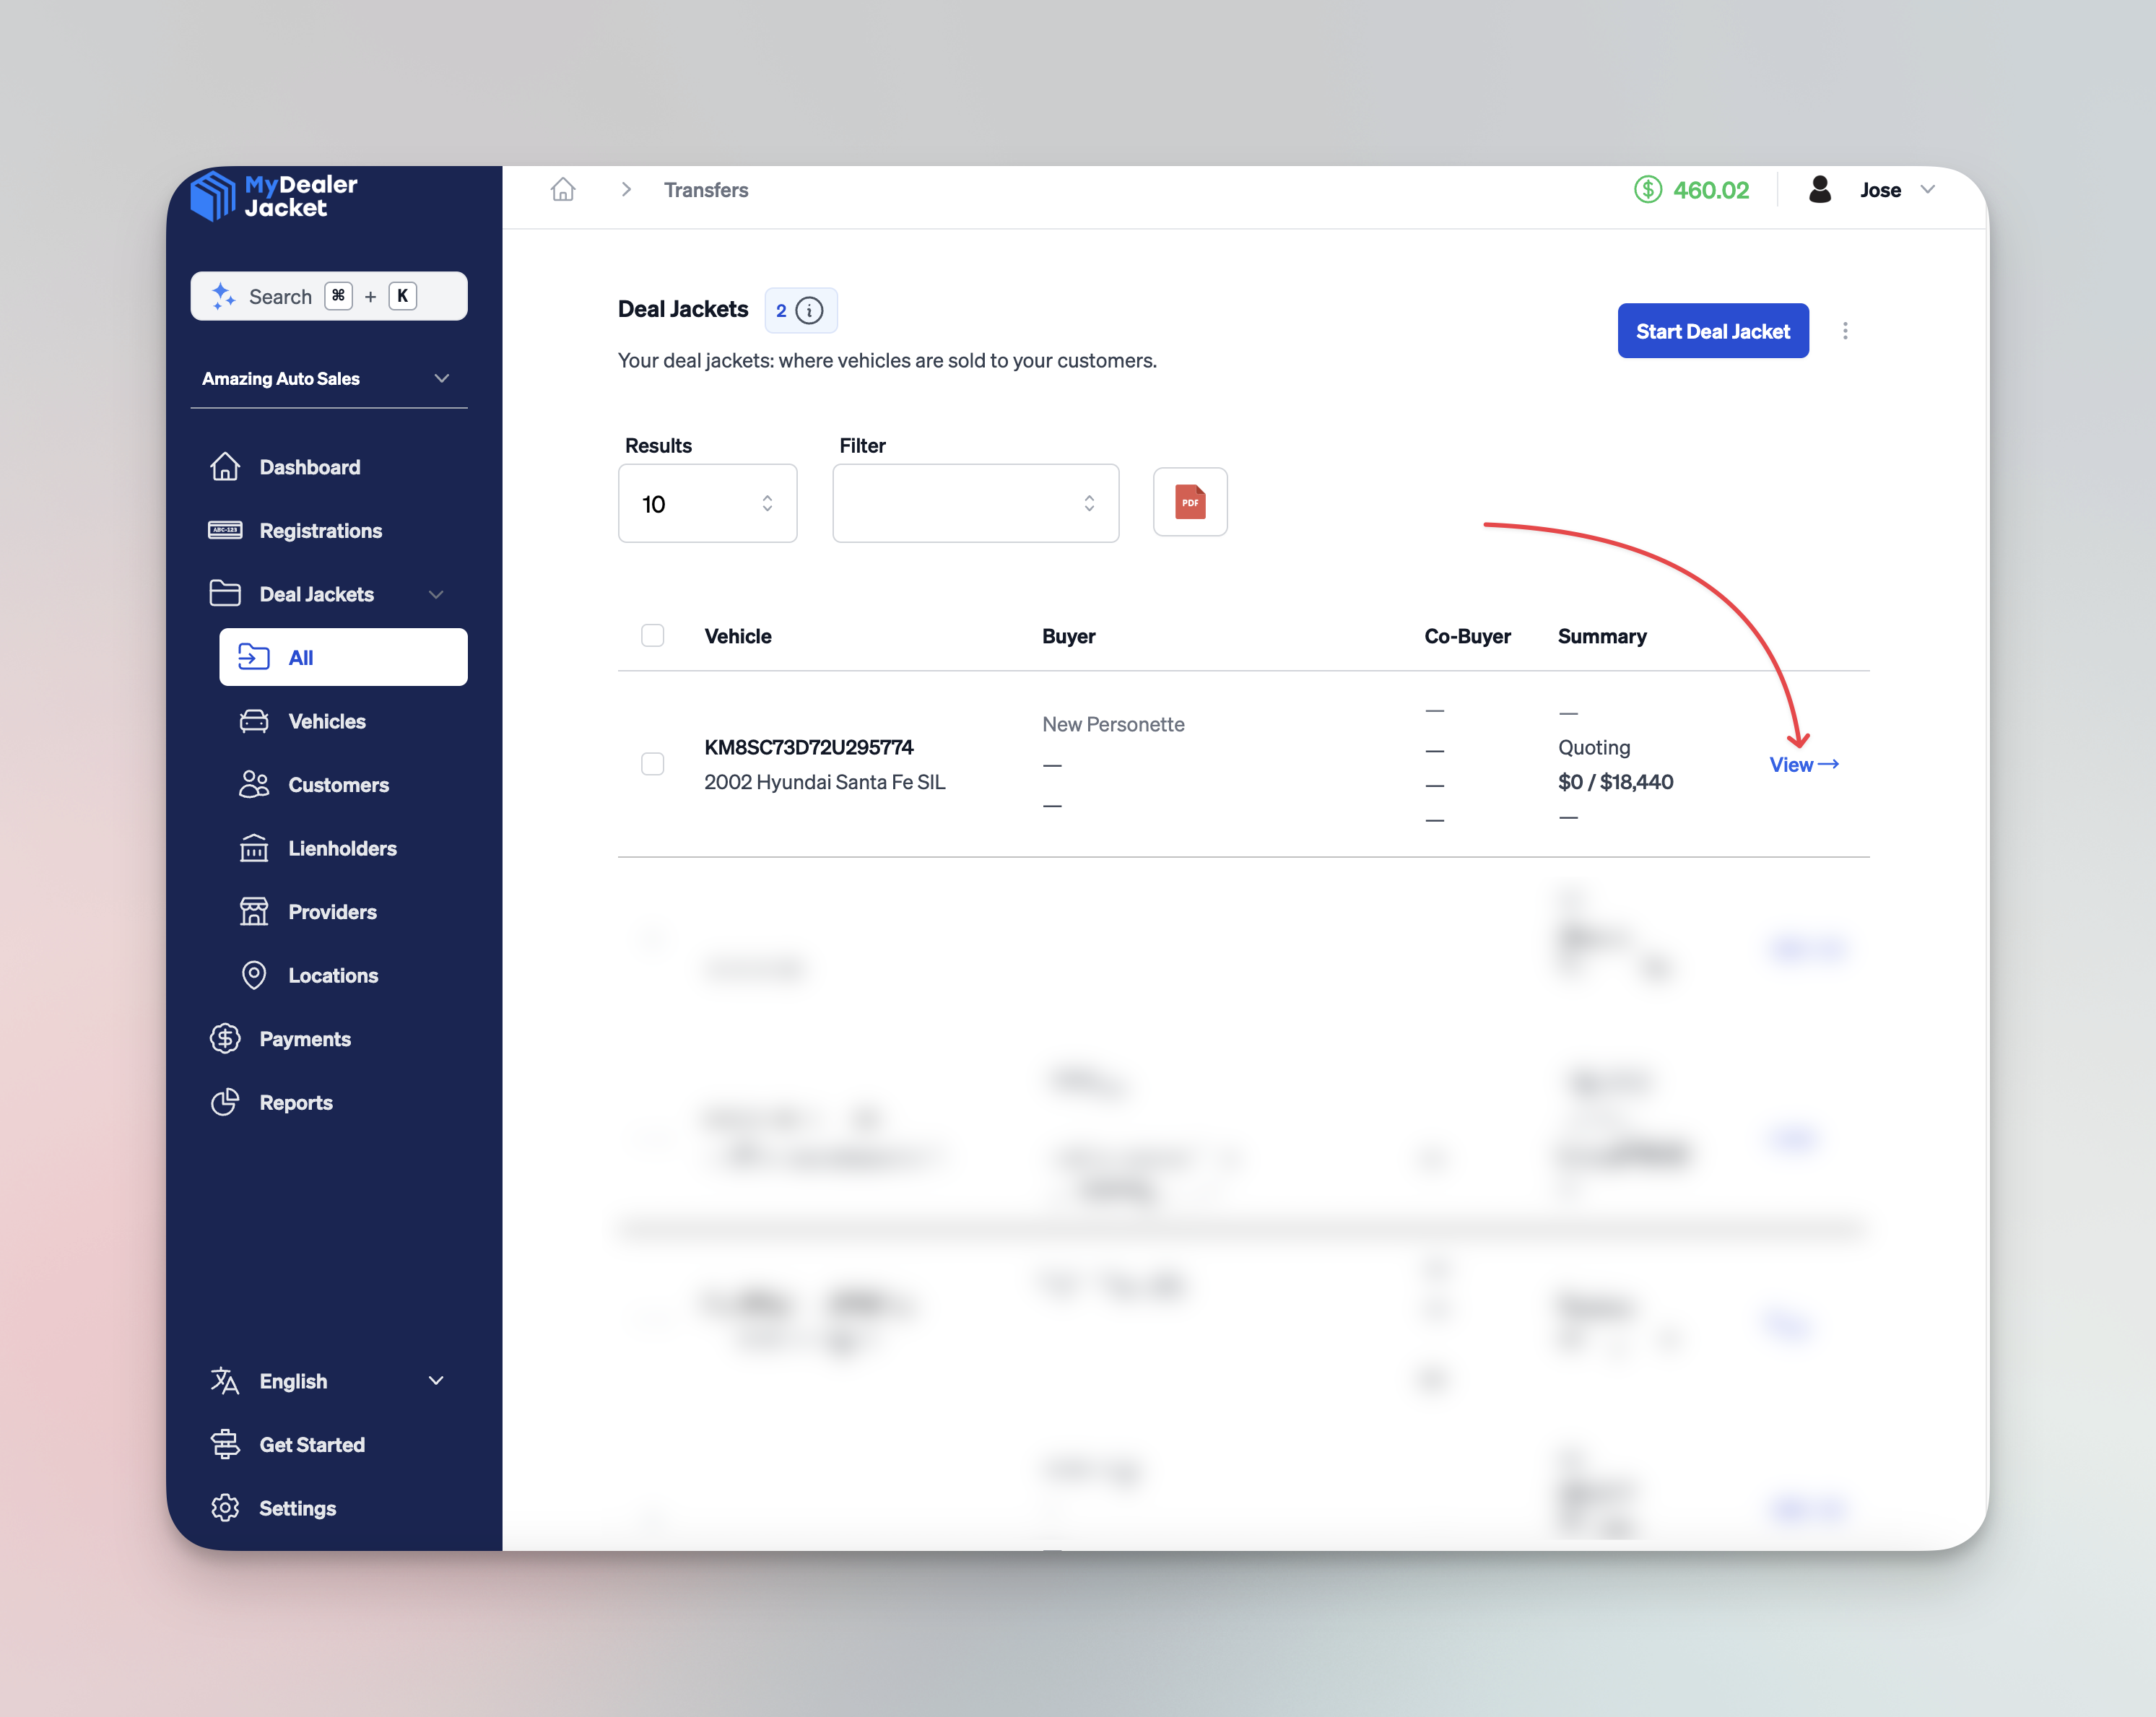
- In the All tab, locate the relevant deal jacket and select View.
Open the Pricing Tab
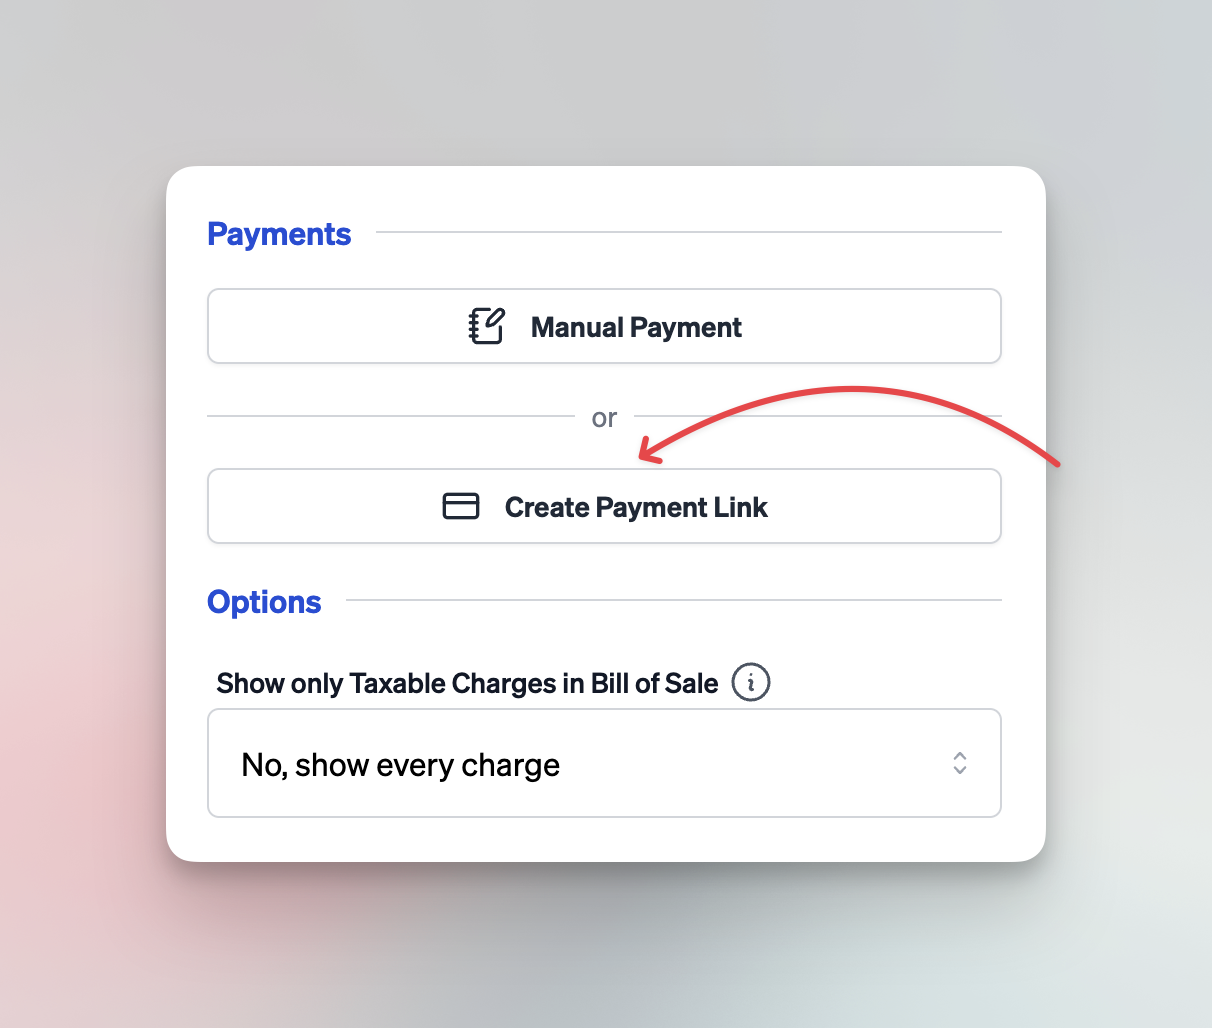
Within the selected deal jacket, click the Pricing tab in the top menu. Here, you’ll find the Payments section on the right-hand side.
Create a Payment Link
- Under Payments, click Create Payment Link.
- A modal will appear with the Amount field, which defaults to the current balance of the deal jacket.
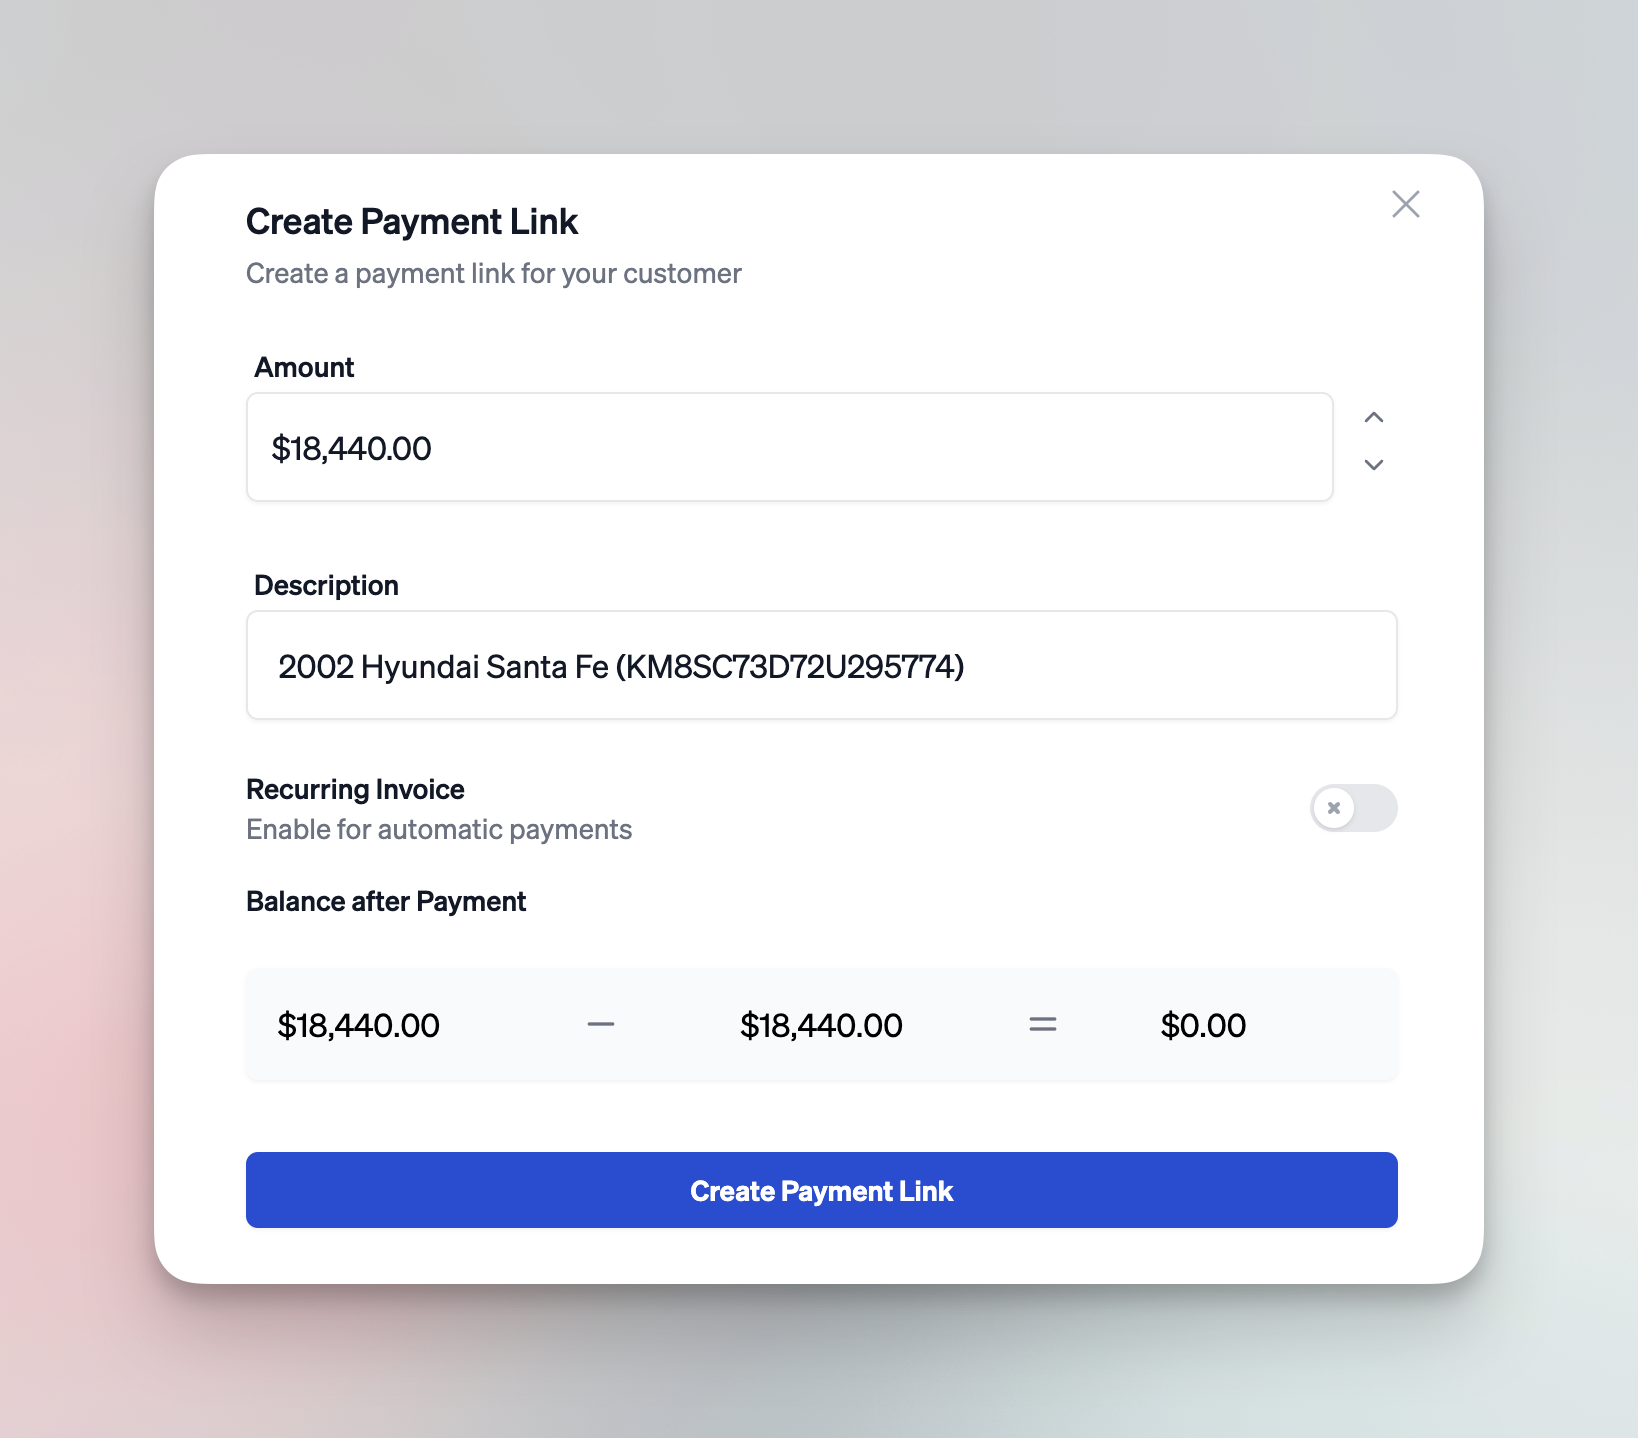
- Adjust this amount if necessary, then click Create Payment Link.
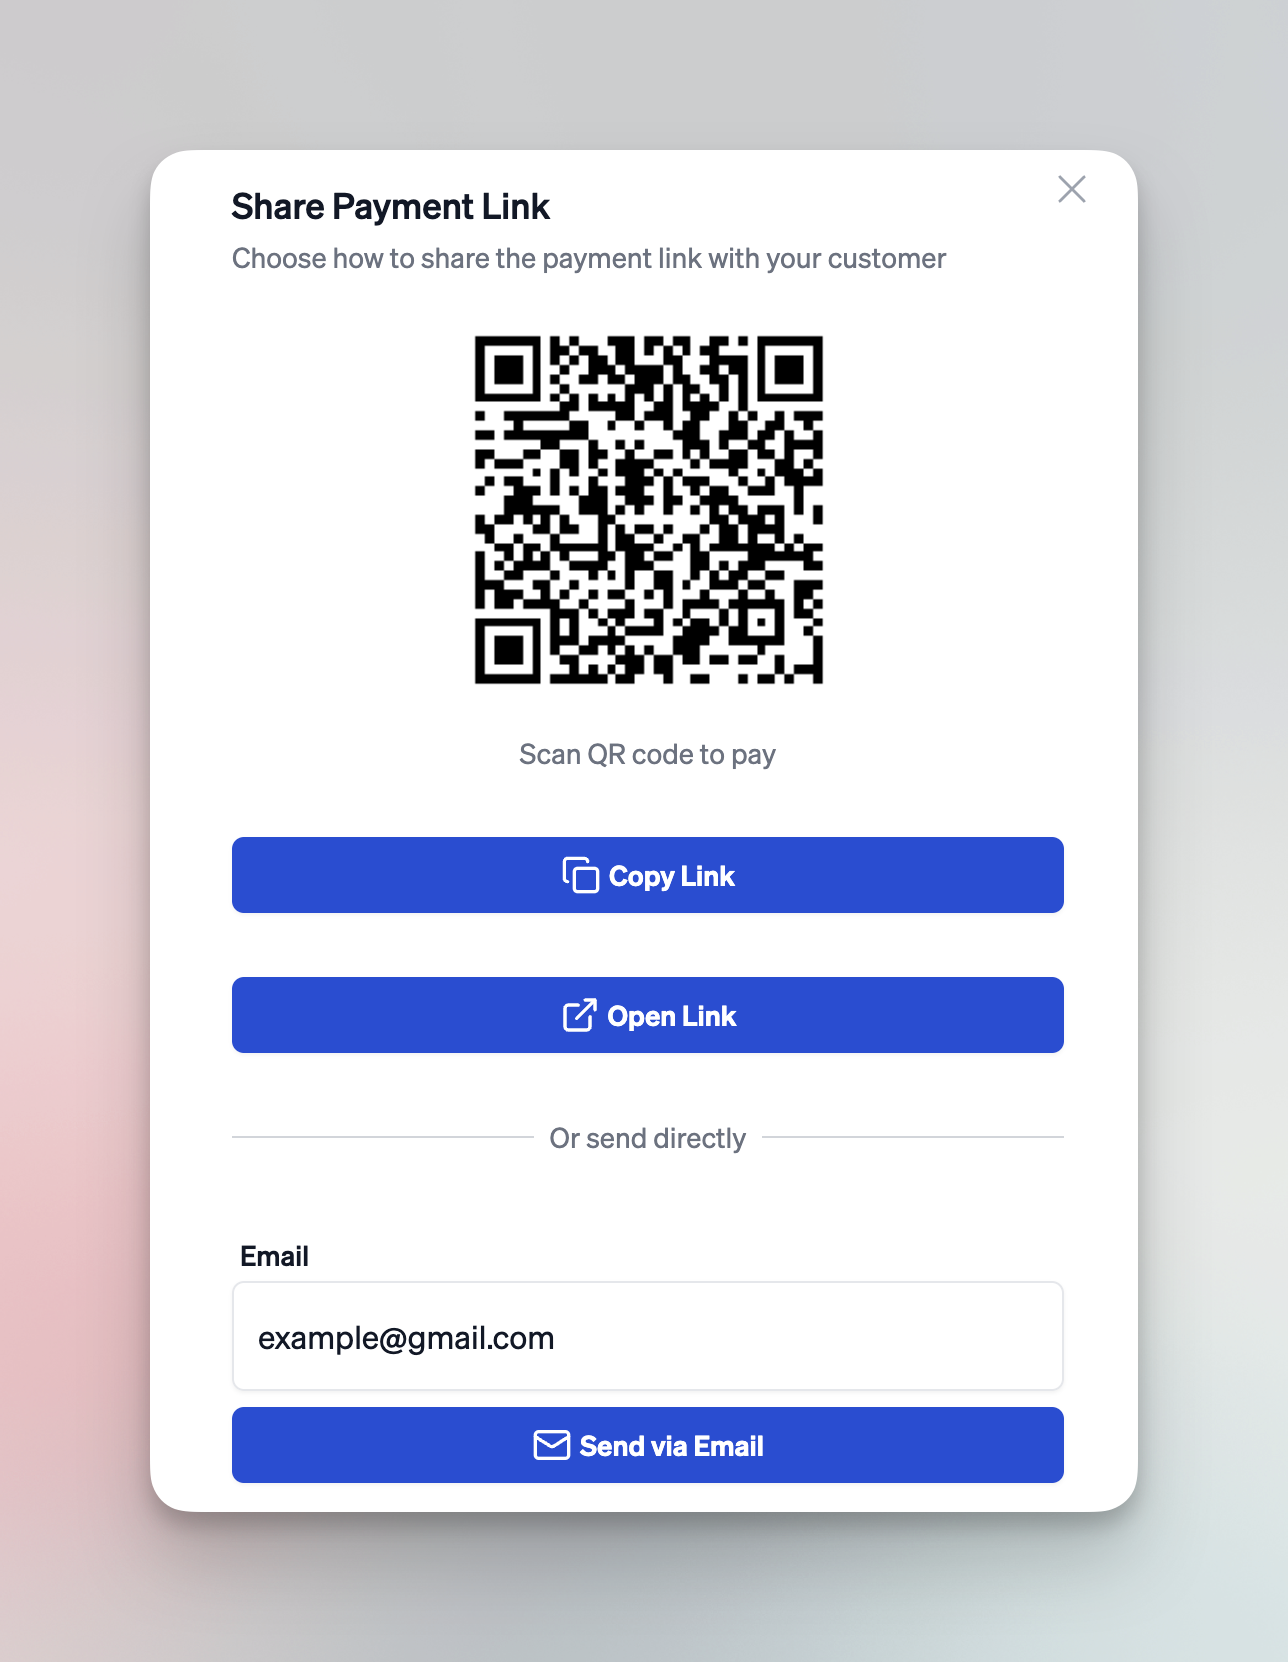
Share the Payment Link
After you click Create Payment Link, another modal opens to let you share the link. You have four sharing options:
- QR Code: The buyer can scan the displayed QR code with their mobile device.
- Copy Link: Copies the payment link to your clipboard for sending manually.
- Open Link: Opens the payment page in a new tab/window.
- Send via Email: Sends the link to the buyer’s email, which is auto-populated if previously provided in the Buyer tab. You can edit this email before sending.
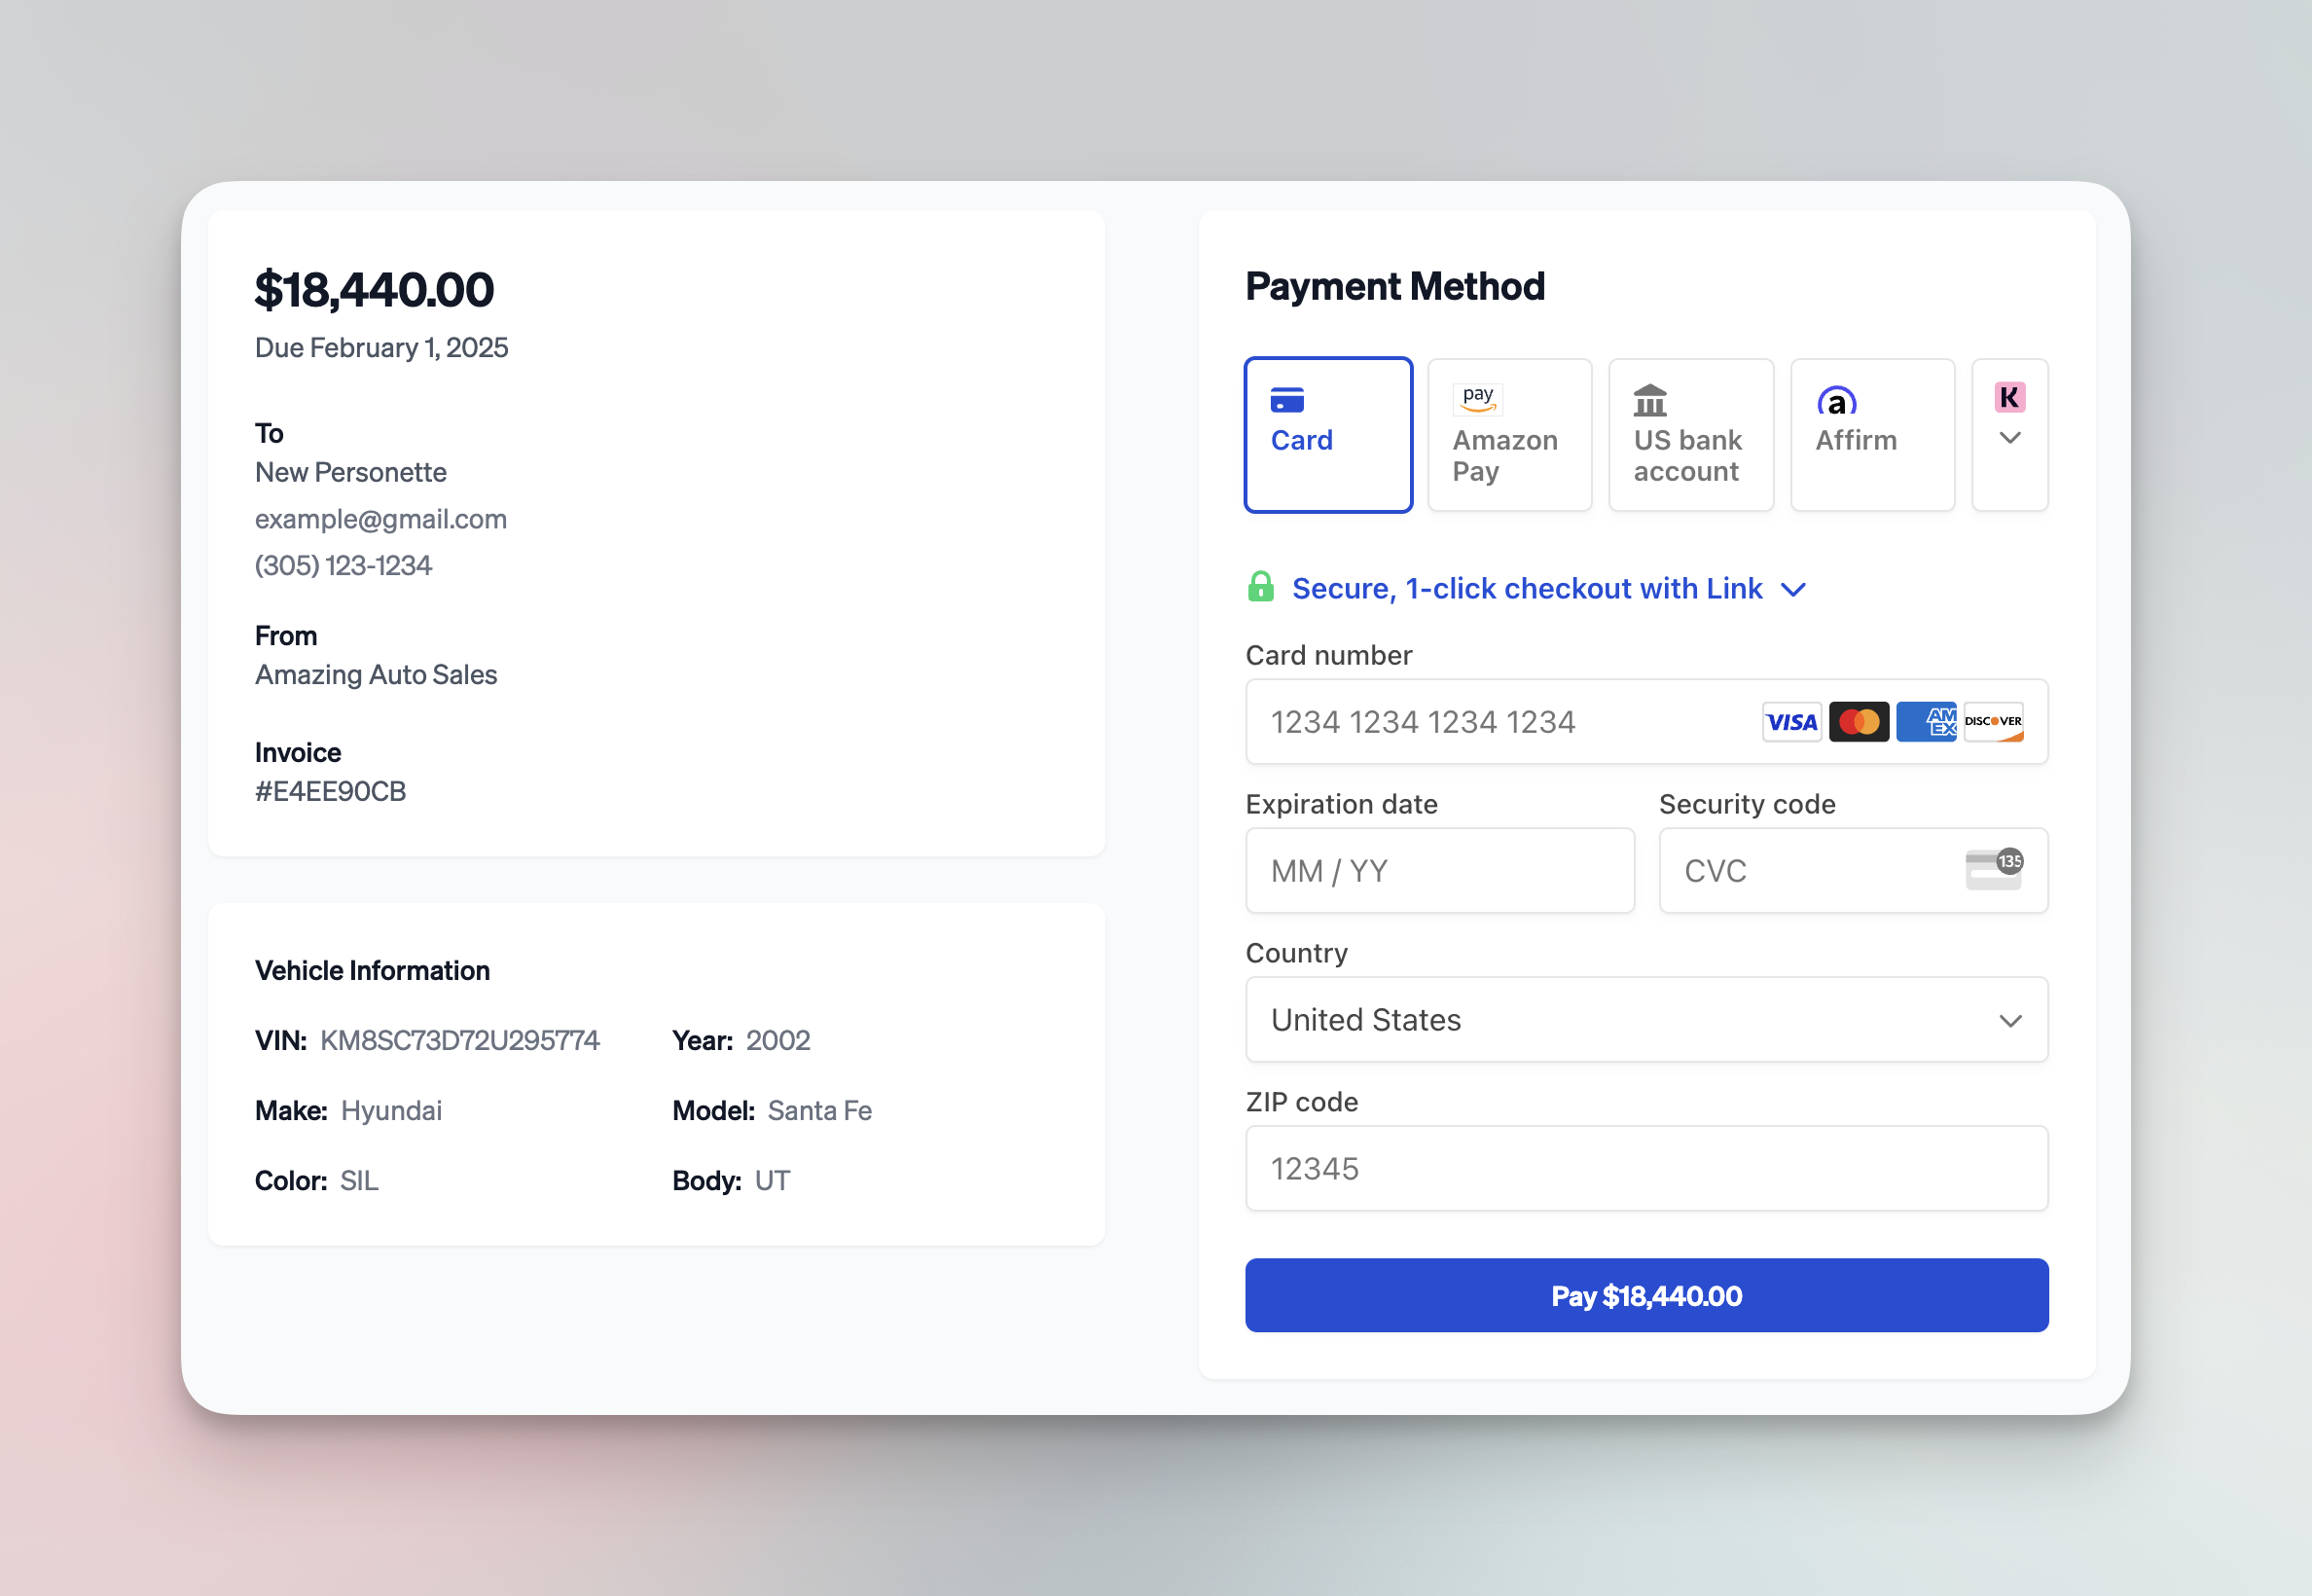
Customer Payment Page
When the buyer opens the payment link, they’ll see a page with a two-column layout:
- Left Column: Shows the amount due, the dealership name (to whom the payment is being made), the buyer’s name (who is being charged), and brief vehicle info.
- Right Column: Displays the secure payment form where the buyer can enter card details or other accepted payment methods.
Managing the Payment
Once the payment link is created, the Payments section in the Pricing tab updates to show a new card representing this payment request:
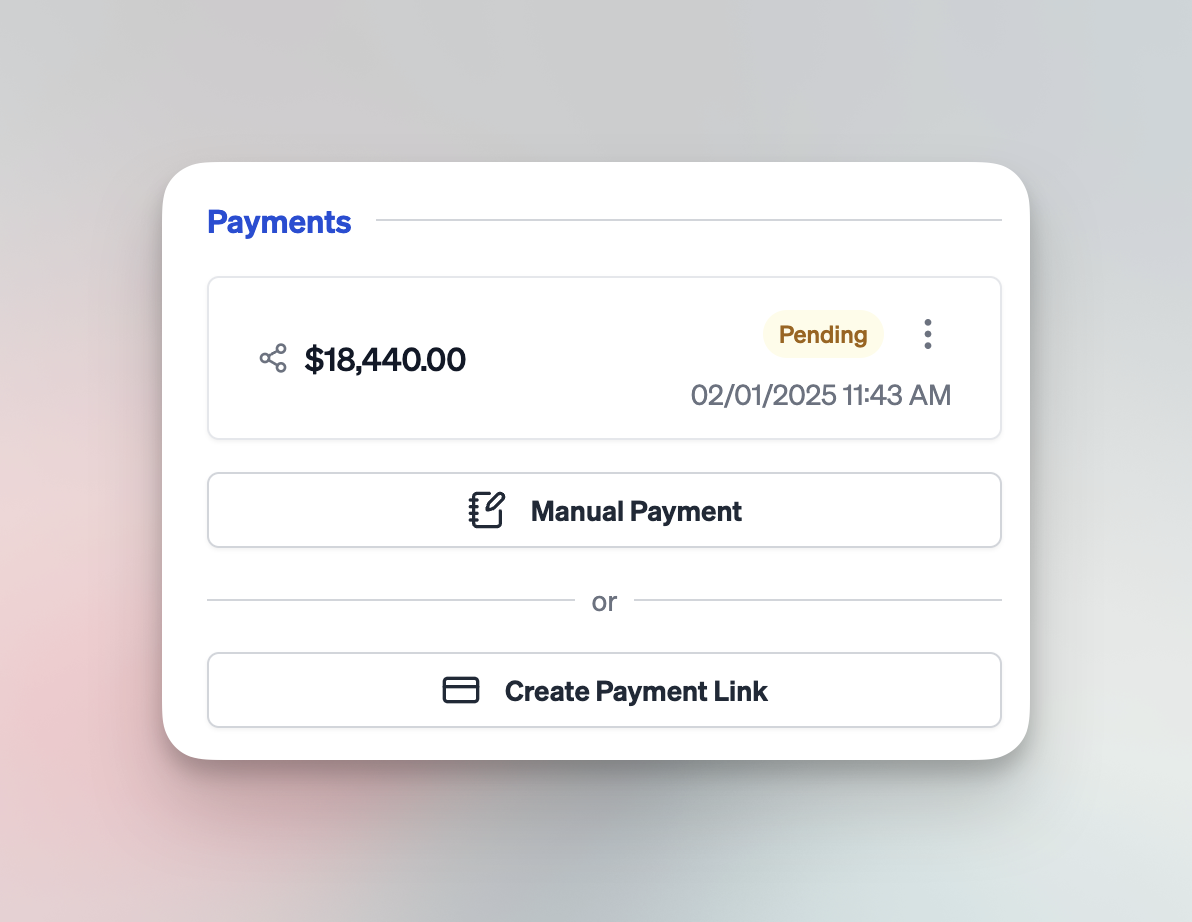
Payment Card Details
- Amount: Displays the requested payment amount on the left.
- Status: Indicates whether the payment is “Pending,” “Paid,” or “Canceled.”
- Date Created: Shows when the payment link was generated.
- Three-Dot Menu: Provides additional actions.
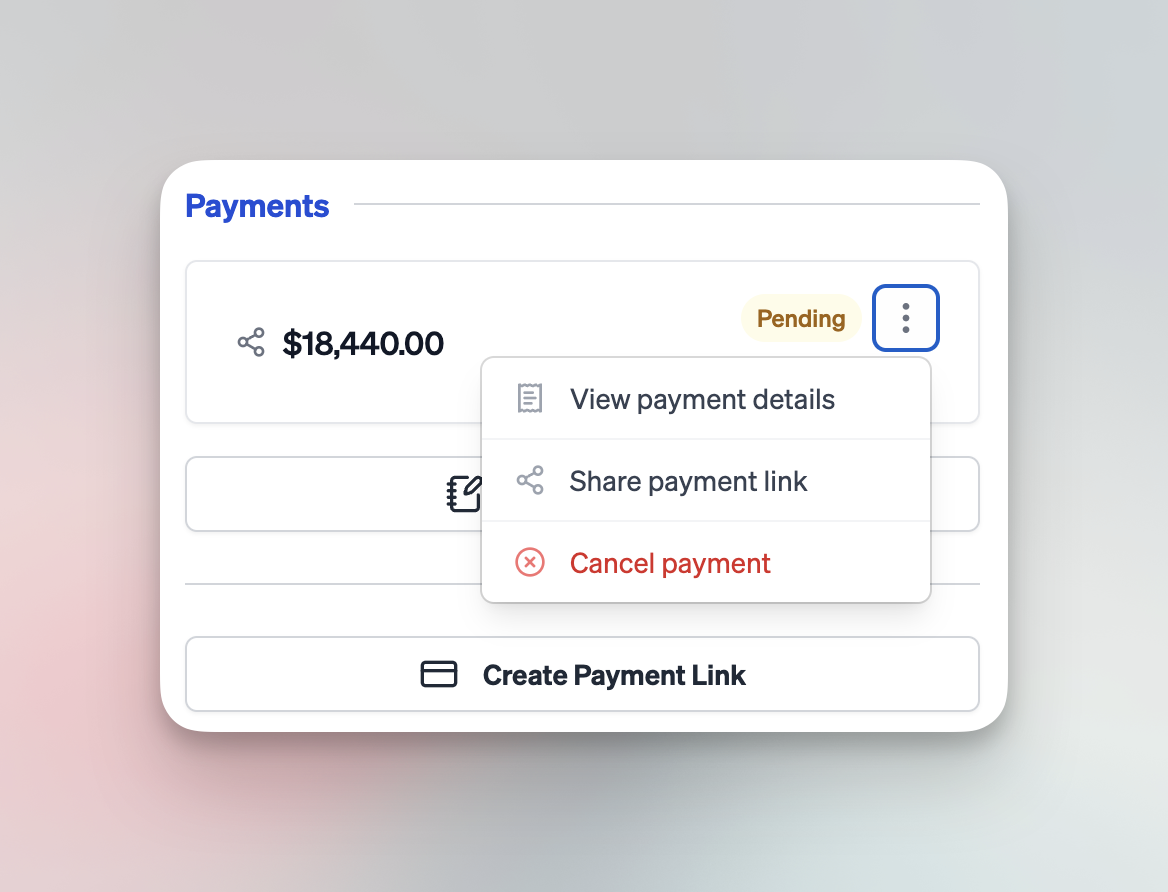
Three-Dot Menu Actions
- View Payment Details
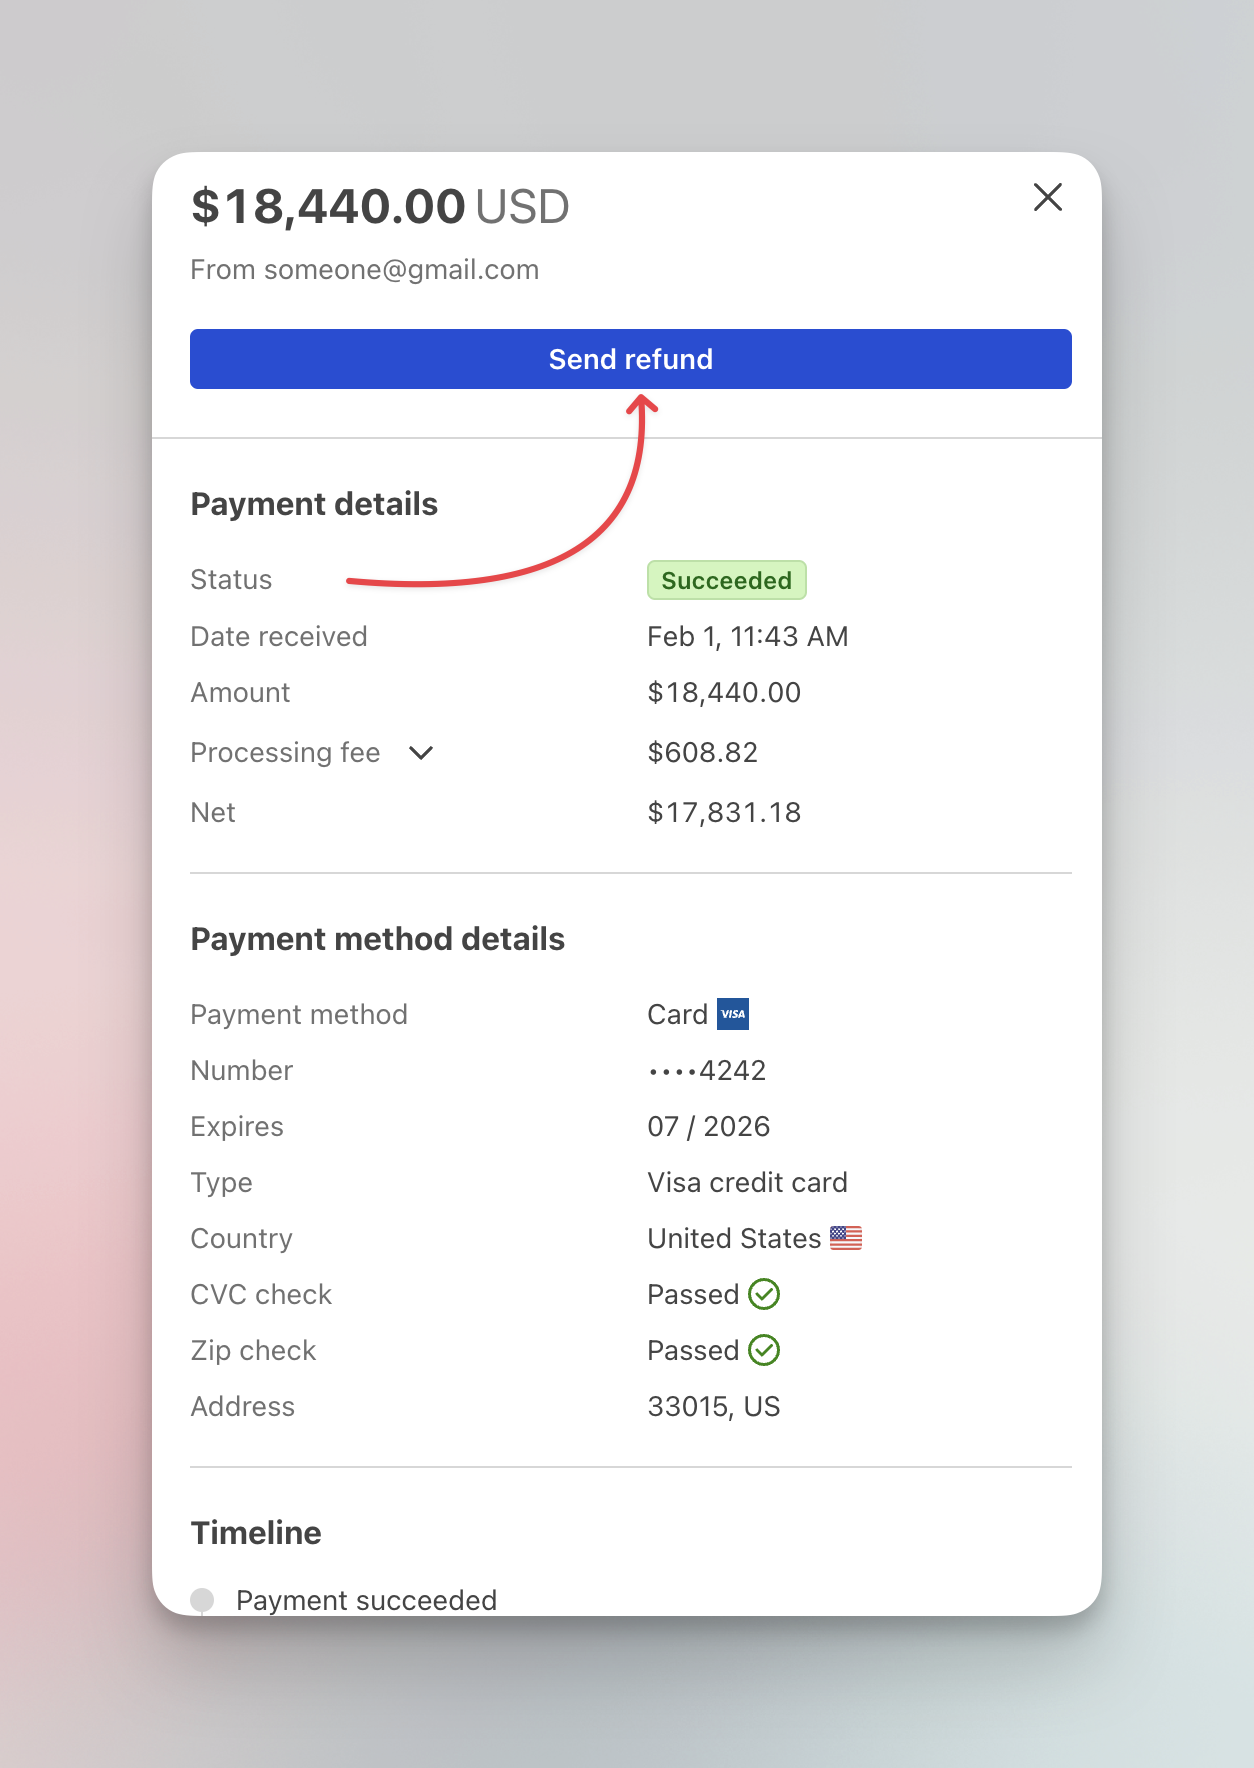
- Opens a panel with status, date, fees charged (after payment), payment method summary, and a Send Refund button (if payment is already made).
- Share Payment Link
- Re-opens the share modal with all the link-distribution options (QR code, copy link, email, etc.).
- Cancel Payment
- Cancels the payment request. If a buyer attempts to use the link afterward, they’ll see a message indicating the payment was canceled.
Issuing a Refund
If the buyer has already paid, you can issue a refund from the Payment Details panel:
- Select View Payment Details in the three-dot menu.
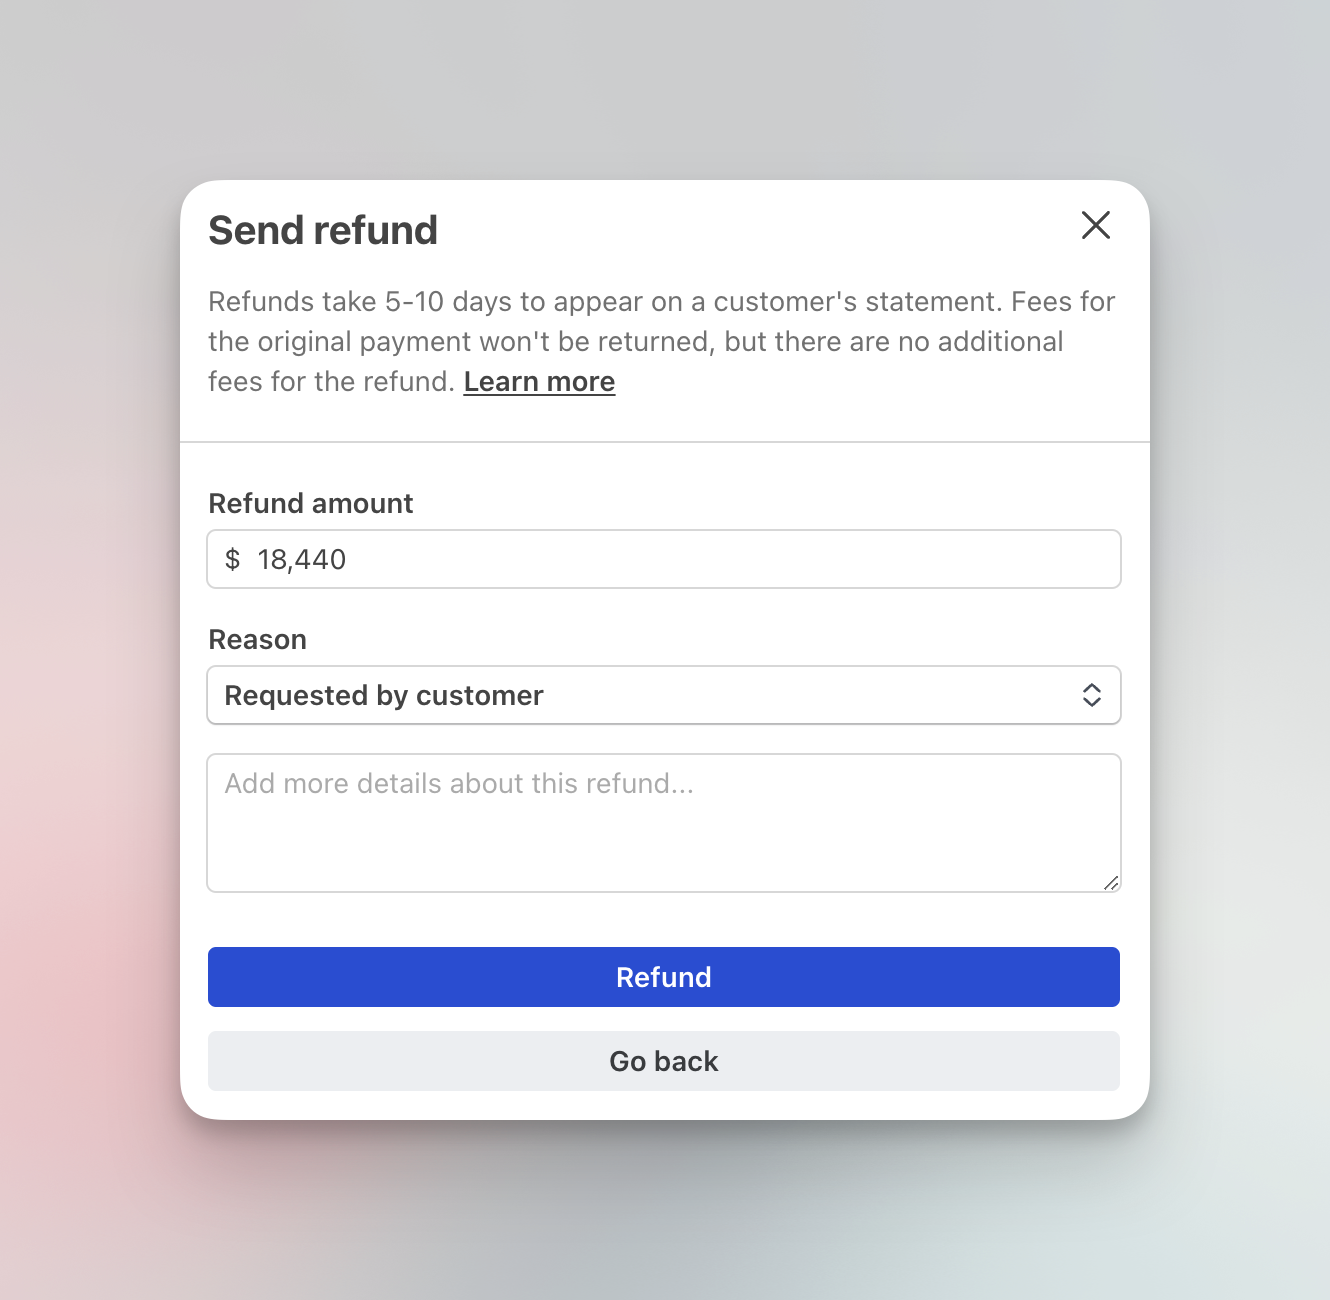
- In the details panel, click Send Refund.
- Specify the Amount to refund (defaults to the full payment).
- Click Refund to process the refund.
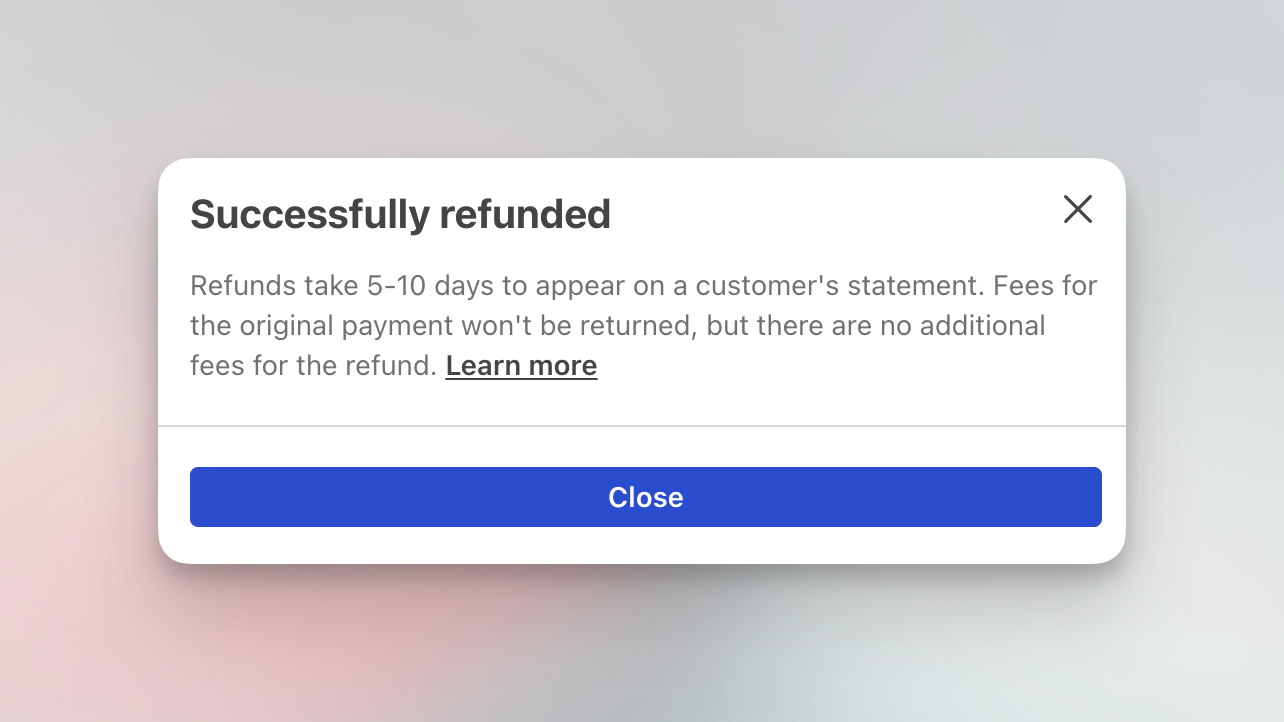
- A confirmation modal will appear indicating the refund was successfully processed.
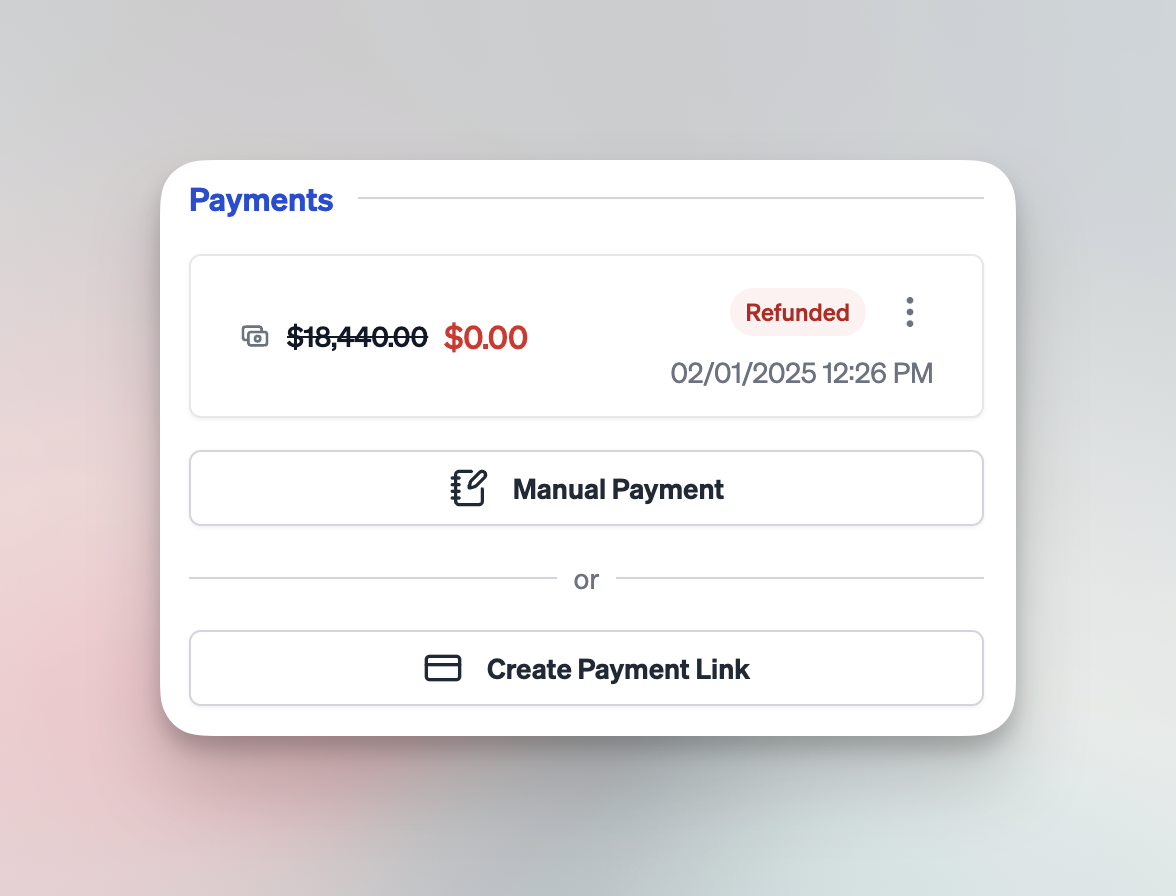
- The payment card will update to show the refund amount and the new status.
Canceling a Payment
To cancel a pending payment request:
- Click the three-dot menu on the payment card.
- Select Cancel Payment.
Once canceled, the link will be invalidated, and any user attempting to access it will see a cancellation notice.
Next Steps
- View Payment History: Keep track of all payment links, including canceled or refunded ones, within the Pricing tab.
- Multiple Payments: You can create additional payment links if partial payments or separate installment arrangements are needed.